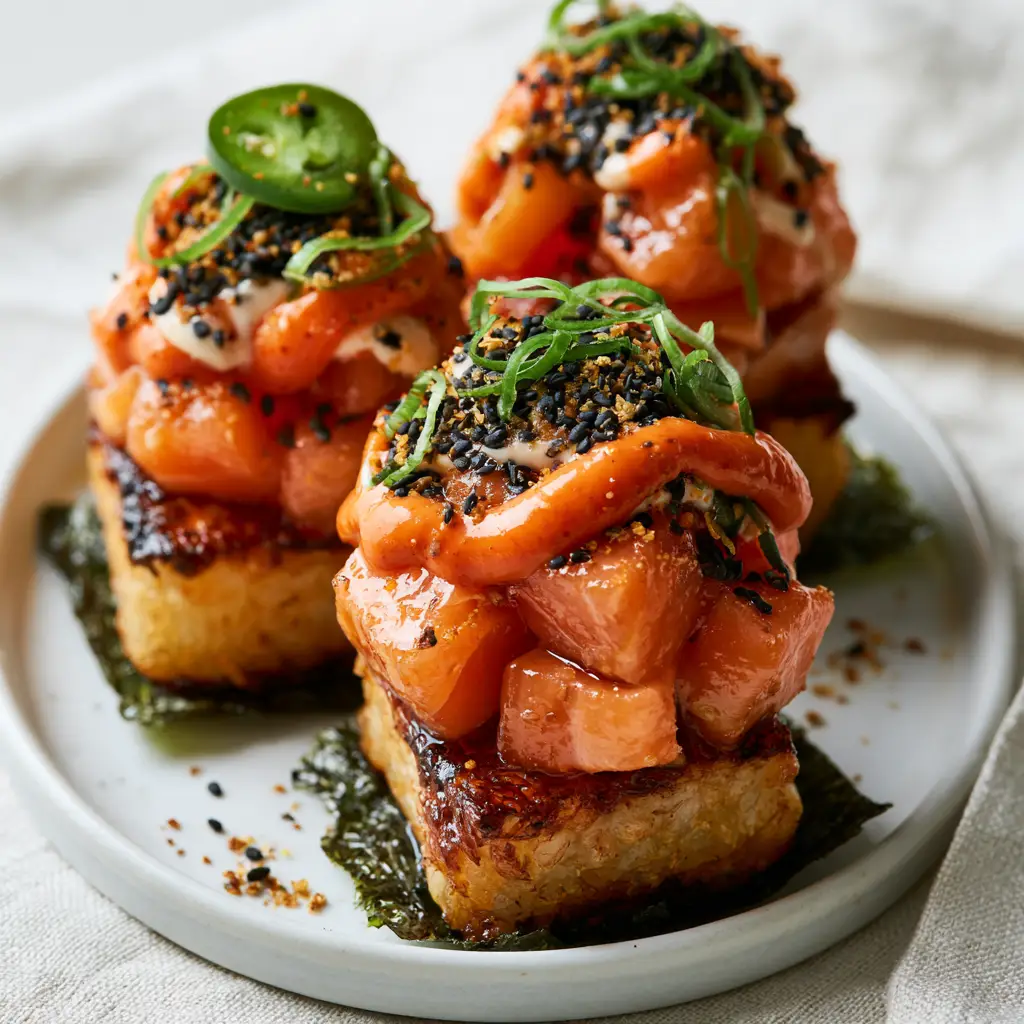
Sushi cups are the ultimate bite-sized explosion of flavor and texture that your dinner routine has been missing. Imagine the satisfying crunch of a golden-brown pan-seared rice cake meeting the buttery smoothness of fresh, cubed raw salmon. This recipe takes everything you love about a spicy salmon roll and transforms it into a sophisticated, handheld appetizer that looks like it came straight from a high-end sushi bar. Whether you are hosting a party or just craving a gourmet snack, these sushi cups provide a hyper-realistic restaurant experience right in your own kitchen.
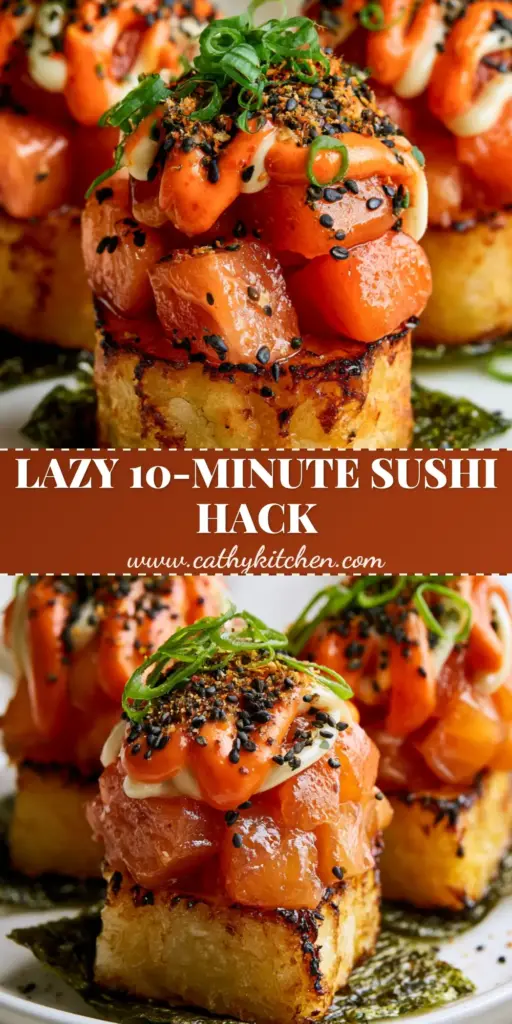
The beauty of these sushi cups lies in the structural contrast. By nestling a crispy rice base inside a dark green toasted nori seaweed square, you create a sturdy foundation for the vibrant toppings. The glossy, soy-marinated salmon is elevated by a double drizzle of bright orange spicy sriracha mayo and creamy white Kewpie mayo. Finished with a heavy sprinkle of toasted furikake and thin rings of green scallions, every bite is a masterclass in Japanese-fusion cuisine. Even if you love a good pineapple teriyaki chicken wings platter, these sushi bites will quickly become the new star of your appetizer rotation.
Why You Will Obsess Over These Crispy Sushi Cups
- Unbeatable Texture: The pan-seared crispy sushi rice provides a deep, toasted crunch that contrasts perfectly with the tender, melt-in-your-mouth raw salmon.
- Visual Showstopper: With their vibrant colors and professional-grade mayo zig-zags, these cups are designed for Pinterest-viral engagement.
- Perfectly Balanced Flavors: You get salt from the soy sauce, heat from the fresh jalapeno slices and sriracha, and a hint of sweetness from the seasoned sushi rice.
- Handheld Convenience: No chopsticks required! These are the perfect “grab-and-go” luxury snack for busy weeknights or elegant gatherings.
The Anatomy of Perfect Sushi Cups: Ingredient Deep Dive
To achieve the Visual Recipe Blueprint results, each ingredient must serve a specific culinary purpose. Do not skip the seasoning of the rice, as this is the secret to that authentic “sushi” flavor profile.
- Sushi Rice: You must use short-grain Japanese rice. Its high starch content is what allows the rice cakes to hold their shape during the searing process.
- Nori Sheets: Use high-quality toasted nori seaweed squares. These provide an earthy, umami-rich “wrapper” that keeps your fingers clean.
- Sashimi-Grade Salmon: Since we are using cubed raw salmon, freshness is paramount. Look for salmon specifically labeled for raw consumption.
- Kewpie Mayo: This Japanese mayo is richer and creamier than Western versions, made with egg yolks and MSG for a distinct savory depth.
- Sriracha: The heat source for our spicy sriracha mayo.
- Furikake: A dry Japanese seasoning typically containing black sesame seeds, dried seaweed, and salt. It adds a professional finishing touch.
- Aromatic Garnishes: Sliced green scallions and fresh jalapeno slices provide a necessary bite of freshness to cut through the rich mayo.
How to Master the Crispy Rice Base
The foundation of a great sushi cup is the rice. If the rice isn’t crispy, the whole dish loses its structural integrity. Follow these steps to ensure a golden-brown finish every time.
Step 1: Preparing the Seasoned Sushi Rice
Start by rinsing 2 cups (400g) of sushi rice under cold water until the water runs clear. Cook according to package instructions. While the rice is still warm, fold in a mixture of rice vinegar, sugar, and salt. This seasoning is vital for the “stickiness” required to form the cups. If you enjoy meal prepping, you could even serve this alongside a creamy chicken and rice casserole for a diverse weekly menu.
Step 2: Pressing and Chilling
Transfer the seasoned rice to a parchment-lined square baking dish. Press it down firmly until it is about 3/4 inch (2cm) thick. Pro Tip: Chill the rice in the refrigerator for at least 2 hours, or even overnight. Cold rice fries much better than fresh, warm rice and won’t fall apart in the pan.
Step 3: The Searing Process
Cut the chilled rice into small squares, roughly 2×2 inches. Heat a generous amount of neutral oil (like avocado or vegetable oil) in a non-stick skillet over medium-high heat. Carefully place the rice squares in the pan. Visual Cue: Sear each side for 3-4 minutes until a thick, golden-brown crust forms. The rice should sound hollow and crunchy when tapped with a spatula.
Assembling the Ultimate Sushi Cups
Now that your base is ready, it is time to build the layers. This is where the sushi cups come to life visually.
Marinating the Salmon
In a small bowl, toss your cubed raw salmon with a tablespoon of light soy sauce and a teaspoon of sesame oil. Let it sit for 5 minutes. This ensures the fish is seasoned all the way through before it hits the rice base.
Layering for Height and Color
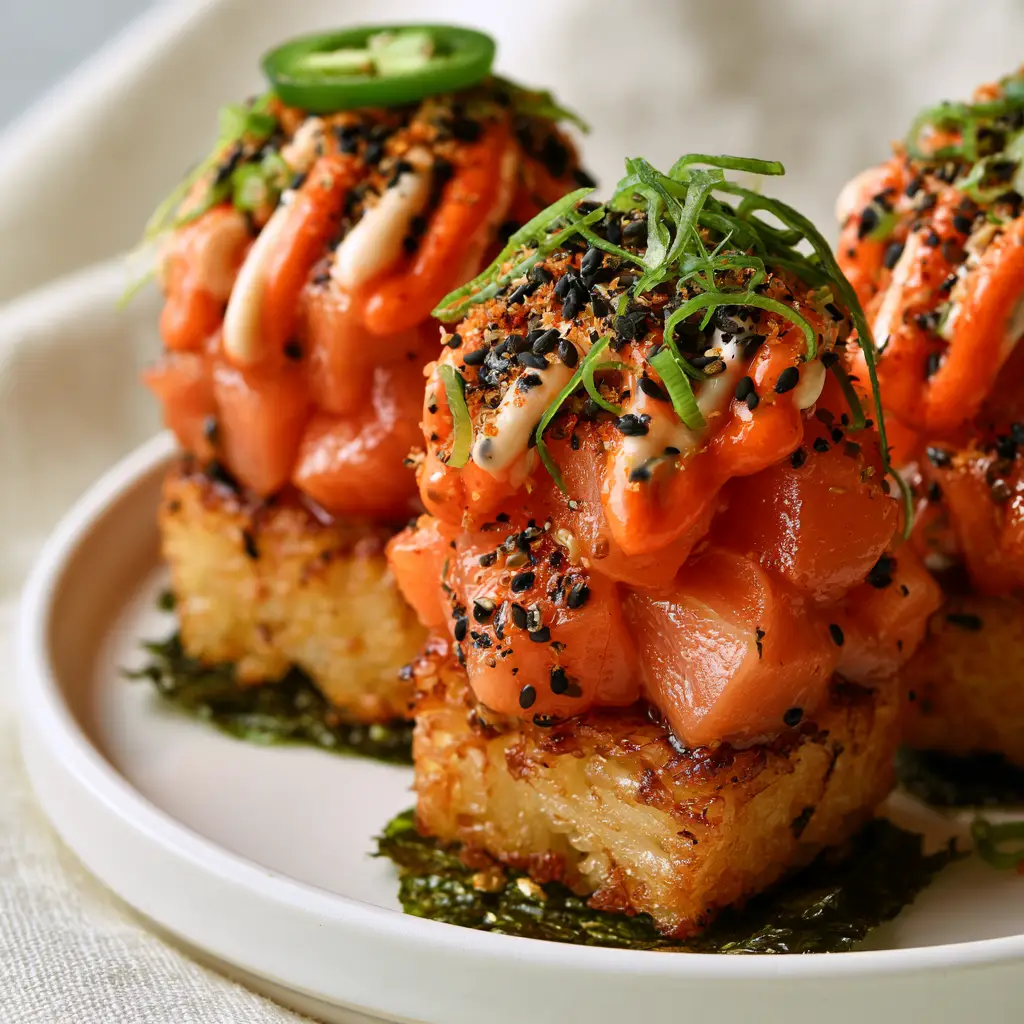
Place a crispy rice cake onto a toasted nori seaweed square. The nori should be slightly larger than the rice. Top the rice with a generous mound of the marinated salmon. If you like a variety of textures, you could even experiment with adding a dollop of greek yogurt macaroni salad on the side of your platter for a fusion twist.
The “Pinterest-Perfect” Drizzle
Using a squeeze bottle or a small spoon, apply a thick, creamy zig-zag drizzle of the orange spicy sriracha mayo. Follow up with a thinner drizzle of the white Kewpie mayo. The contrast between the orange and white sauces is a key Midjourney Prompt requirement for that high-end food styling look.
The Final Flourish
Garnish each of your sushi cups with a heavy sprinkle of black sesame seeds and toasted furikake. Add ultra-thin rings of bright green scallions for height. For the final touch, place a single slice of fresh jalapeno on top of a few cups to signal the spice level to your guests.
Expert Tips for Success
- Keep Your Hands Wet: When handling sushi rice, keep a bowl of water nearby. Wet fingers prevent the rice from sticking to your skin.
- Don’t Overcrowd the Pan: When searing the rice cakes, leave space between them. Overcrowding lowers the oil temperature and results in soggy rice instead of crispy sushi rice.
- Use a Sharp Knife: When slicing the salmon and jalapenos, use your sharpest knife to ensure clean, professional edges that look great in photos.
- Serve Immediately: The contrast between the warm, crispy rice and the cold, raw salmon is best enjoyed right away. The nori will also lose its crispness if it sits for too long.
Storage, Reheating & Freezing
Storage: These sushi cups are best consumed immediately due to the raw fish. However, you can store the crispy rice cakes (without toppings) in an airtight container in the fridge for up to 2 days. Reheating: To restore the crunch, briefly re-fry the rice cakes in a pan with a little oil. Freezing: We do not recommend freezing this dish, as the texture of the rice and the quality of the raw salmon will be significantly compromised.
What to Serve With Sushi Cups
These cups are quite rich, so they pair beautifully with light, acidic sides. Consider a fresh cucumber salad or a seaweed salad. For a full party spread, they complement other handheld favorites like frozen yogurt bites for dessert or a savory creamy garlic mushrooms appetizer.
Frequently Asked Questions
They can be! Ensure you use Tamari instead of soy sauce and check that your furikake and sriracha are certified gluten-free.
Yes, you can air fry the rice cubes at 400°F (200°C) for about 10-15 minutes, flipping halfway, until they are golden and crunchy.
Yes! If you prefer not to eat raw fish, you can use canned salmon mixed with a little mayo, or pan-sear your salmon cubes before assembly.
The secret is chilling the pressed rice for at least 2 hours. This dries out the surface slightly, allowing for a much better sear in the pan.
Short-grain Japanese sushi rice is essential. Its high starch content makes it sticky enough to form cakes that won’t fall apart when fried.
The Official Crispy Sushi Cups Recipe
Sushi Cups with Crispy Pan-Seared Rice and Spicy Salmon
Ingredients
Equipment
Method
- Press seasoned sushi rice into a lined baking dish and chill for 2 hours until firm.
- Cut rice into squares and pan-fry in oil over medium-high heat until thick and golden-brown on both sides.
- Toss cubed salmon with soy sauce.
- Place rice on nori, top with salmon, drizzle with both mayos, and finish with furikake, scallions, and a jalapeno slice.
Notes
Ensure the oil is hot before adding rice to get that perfect crust.
Join the Kitchen Conversation!
Did you make these sushi cups? We want to see your crispy rice masterpieces! Save this recipe to your Pinterest “Appetizer Goals” board and follow cathy_kitchen_official for more viral-worthy recipes. Don’t forget to upload a photo of your creation in the comments below and leave us a 5-star rating if you loved the crunch!