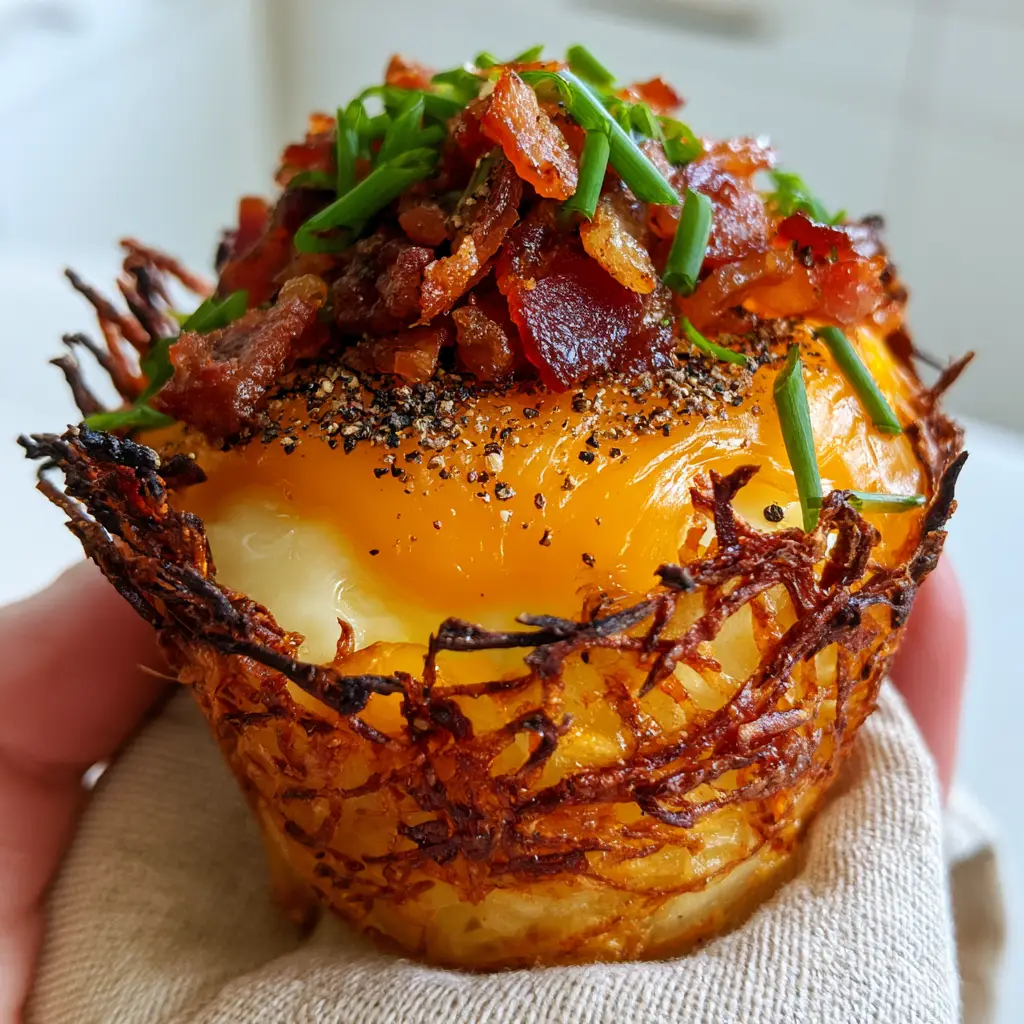
Hash brown egg cups are the ultimate solution for busy mornings when you crave a gourmet, handheld breakfast that doesn’t compromise on texture or flavor. These golden-brown nests feature deep, charred, lacy edges that provide an incredible crunch, contrasting perfectly with a soft-set egg center and bubbling sharp orange cheddar cheese.
If you are looking for a recipe that looks as good as it tastes, these hash brown egg cups deliver a restaurant-quality aesthetic right in your own kitchen. The combination of smoked bacon crumbles, vibrant red bell peppers, and fresh chives makes these a viral-worthy addition to any brunch spread.
Why You Will Love These Crispy Breakfast Nests
- Ultimate Crunchy Texture: The shredded potato base is baked until the edges are deep golden-brown and lacy, providing a satisfying snap in every bite.
- Perfectly Set Eggs: We use a two-stage baking process to ensure the potatoes are crispy while the egg yolks stay tender and buttery.
- Bold Flavor Profile: Smoked bacon and sharp cheddar provide a salty, savory punch that balances the earthy potato.
- Meal-Prep Friendly: These hold up beautifully and can be reheated for a quick protein-packed breakfast during the week.
Creating these hash brown egg cups is much easier than flipping individual patties, and they pair perfectly with other brunch favorites like lil smokies in a blanket or even a light salmon cake for a full spread.
Essential Ingredients for Success
To achieve that signature charred edge and lacy texture, every ingredient serves a specific culinary purpose. Here is what you will need for these hash brown egg cups:
Shredded Hash Browns: 24 oz (680g) fresh or thawed frozen potatoes. These form the structure of our nest. Ensure they are dry to get that maximum crunch.
Melted Butter: 4 tbsp (56g) unsalted butter. Butter helps the potatoes brown and adds a rich, toasted flavor that oil alone cannot provide.
Sharp Orange Cheddar Cheese: 1 cup (113g) shredded. We want a high-quality sharp cheddar that bubbles and browns for that visual “molten” look.
Large Eggs: 6 to 12 eggs, depending on your muffin tin size. The eggs are the protein powerhouse of this dish.
Smoked Bacon: 4 strips, cooked and crumbled. The smokiness cuts through the richness of the egg and cheese.
Red Bell Pepper: 1/2 cup (50g) finely diced. These add a pop of sweetness and a vibrant red color that makes the dish visually stunning.
Fresh Chives & Black Pepper: For the finishing touch. Fresh herbs provide a burst of oniony brightness, while cracked black pepper adds a necessary bite.
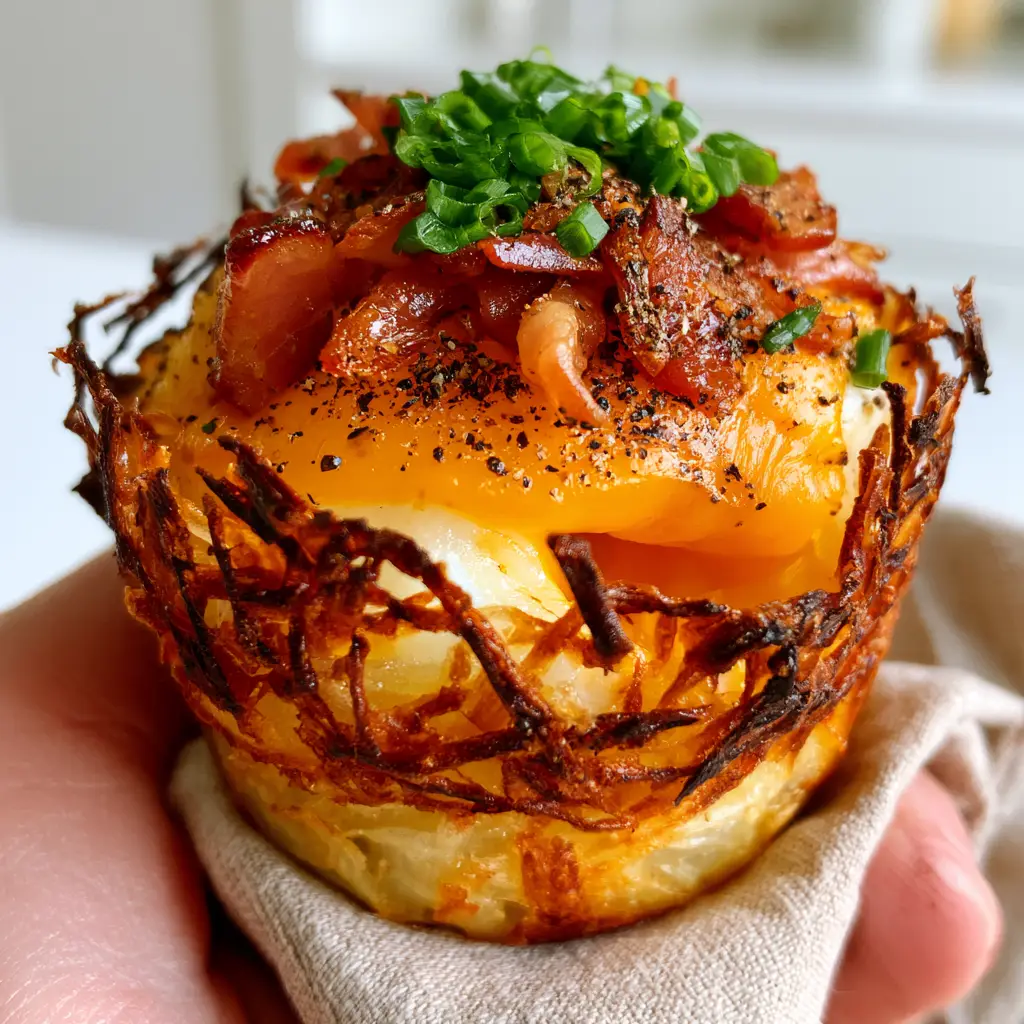
The Secret to Ultra-Crispy Potato Nests
The most common mistake when making hash brown egg cups is a soggy bottom. To prevent this, you must treat the potatoes with care before they ever hit the oven.
Step 1: The Moisture Extraction
If using frozen hash browns, thaw them completely. Place the shredded potatoes in a clean kitchen towel and squeeze with all your might. You want to remove every drop of excess water. This is the difference between a mushy potato and a lacy, charred edge.
Step 2: The Seasoning and Binding
In a large bowl, toss the dried potatoes with melted butter, salt, and cracked black pepper. The fat coats the strands, ensuring they crisp up individually rather than clumping into a dense mass. Much like making Greek potatoes, the fat-to-potato ratio is key for browning.
Step 3: Sculpting the Nests
Grease a standard muffin tin generously. Press about 3 tbsp (45ml) of the potato mixture into each cup. Use your fingers or a small glass to firmly press the potatoes against the bottom and all the way up the sides. You want a thin, even layer that reaches the very top of the rim.
Baking for the Perfect Visual & Texture
Stage One: Pre-Baking the Base
Bake the potato nests at 425°F (220°C) for 15-18 minutes. Look for the edges to become deeply browned and jagged. The potato strands should look like a golden bird’s nest. If the edges aren’t charred, the cup will fall apart when you try to eat it handheld.
Stage Two: The Filling and Finishing
Lower the oven temperature to 375°F (190°C). Sprinkle a small amount of sharp cheddar into the bottom of each nest—this acts as a “seal” for the egg. Crack one egg into each cup. Top with the diced red bell peppers and the smoked bacon crumbles.
Return to the oven for 8-10 minutes. You are looking for the egg whites to be opaque and set, while the yolks remain slightly soft. The cheese should be bubbling and slightly browned around the edges of the bacon.
The Final Flourish
Once removed from the oven, let them rest for 5 minutes. This allows the cheese to set and the potato structure to firm up. Garnish with a heavy dusting of cracked black pepper and a generous sprinkle of finely sliced fresh green chives. The green against the orange cheese and red peppers creates a beautiful, vibrant contrast.
Expert Tips for the Best Hash Brown Egg Cups
- Room Temperature Eggs: Using eggs straight from the fridge can slow down the cooking process, leading to overcooked potatoes. Let them sit out for 20 minutes before baking.
- Don’t Skimp on Fat: The butter is what creates that lacy, fried-like texture. If you are dairy-free, use a high-quality avocado oil.
- Use a Metal Tin: Silicone molds are great for release, but metal muffin tins conduct heat better, which is essential for getting those charred, crispy edges.
- Double the Bacon: If you love a savory crunch, add bacon both inside the nest and on top for extra texture.
For a complete weekend feast, serve these alongside crockpot lasagna leftovers or a fresh fruit salad to balance the savory richness.
Storage and Reheating Guide
These hash brown egg cups are excellent for meal prep. You can store them in an airtight container in the refrigerator for up to 4 days.
To Reheat: Avoid the microwave if you want to preserve the crunch! The best way to reheat is in an air fryer at 350°F (175°C) for 3-5 minutes. This will re-crisp the potato edges and melt the cheese perfectly. If you don’t have an air fryer, a toaster oven or standard oven works well too.
Freezing: You can freeze these for up to 2 months. Wrap them individually in plastic wrap and store in a freezer bag. Thaw in the fridge overnight before reheating.
What to Serve with Breakfast Cups
These cups are quite filling on their own, but they pair beautifully with a variety of sides:
- A simple green salad with a citrus vinaigrette.
- Extra protein like these crispy salmon cakes.
- Freshly roasted tomatoes or a side of tomato bruschetta topping.
- For a sweet finish, try a small piece of caramel apple bark.
Frequently Asked Questions
Yes! Grate russet potatoes, but be sure to rinse them in cold water to remove excess starch, then squeeze them very dry before proceeding with the recipe.
Absolutely! Store them in the fridge for up to 4 days and reheat in an air fryer or toaster oven to maintain the crispy texture of the potato nest.
The secret is the ‘two-stage’ bake. You must pre-bake the potato nests at a high temperature (425°F) with plenty of butter before adding the egg and toppings.
Sogginess usually comes from excess moisture in the potatoes. You must squeeze the shredded potatoes in a kitchen towel until they are completely dry before mixing with butter and baking.
The Ultimate Hash Brown Egg Cups Recipe

Hash Brown Egg Cups with Crispy Bacon and Sharp Cheddar
Ingredients
Equipment
Method
- Thaw hash browns and squeeze out all moisture using a kitchen towel. Toss with melted butter, salt, and pepper.
- Press potato mixture into greased muffin cups, pushing firmly against the bottom and sides to create a nest.
- Bake at 425°F (220°C) for 15-18 minutes until edges are deep golden-brown and charred.
- Reduce heat to 375°F (190°C). Add cheese, crack an egg into each, and top with bacon and peppers.
- Bake for 8-10 minutes until whites are set but yolks remain soft.
Notes
Use a metal tin for superior heat conduction and a crunchier crust.
Share Your Crispy Creations!
Did you manage to get those perfect, lacy charred edges? We want to see! Please save this recipe to your Pinterest Breakfast Board so you never lose it. Follow @cathy_kitchen_official for more high-protein, crispy breakfast inspirations.
If you made these, please leave a 5-star rating and upload a photo of your hash brown egg cups in the comments below. Your feedback helps our community of home cooks thrive!