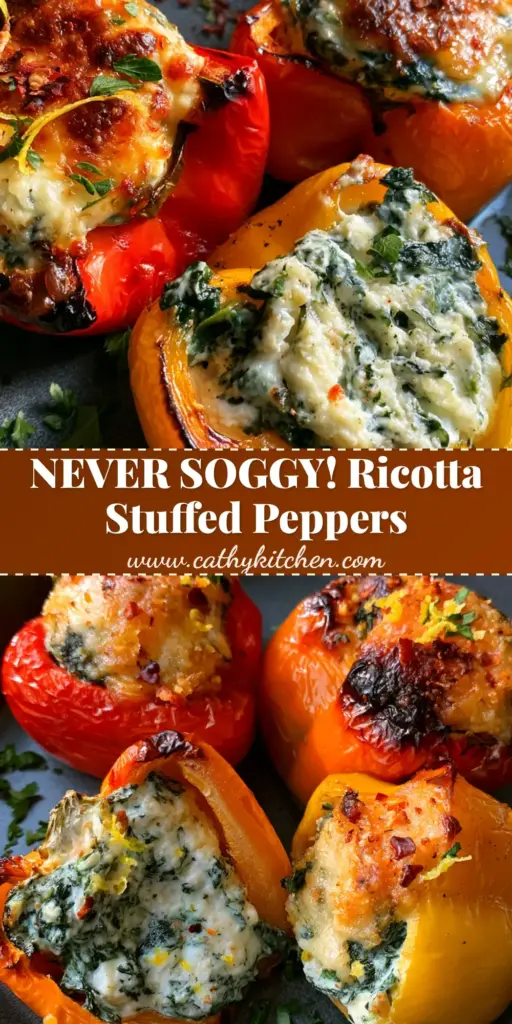
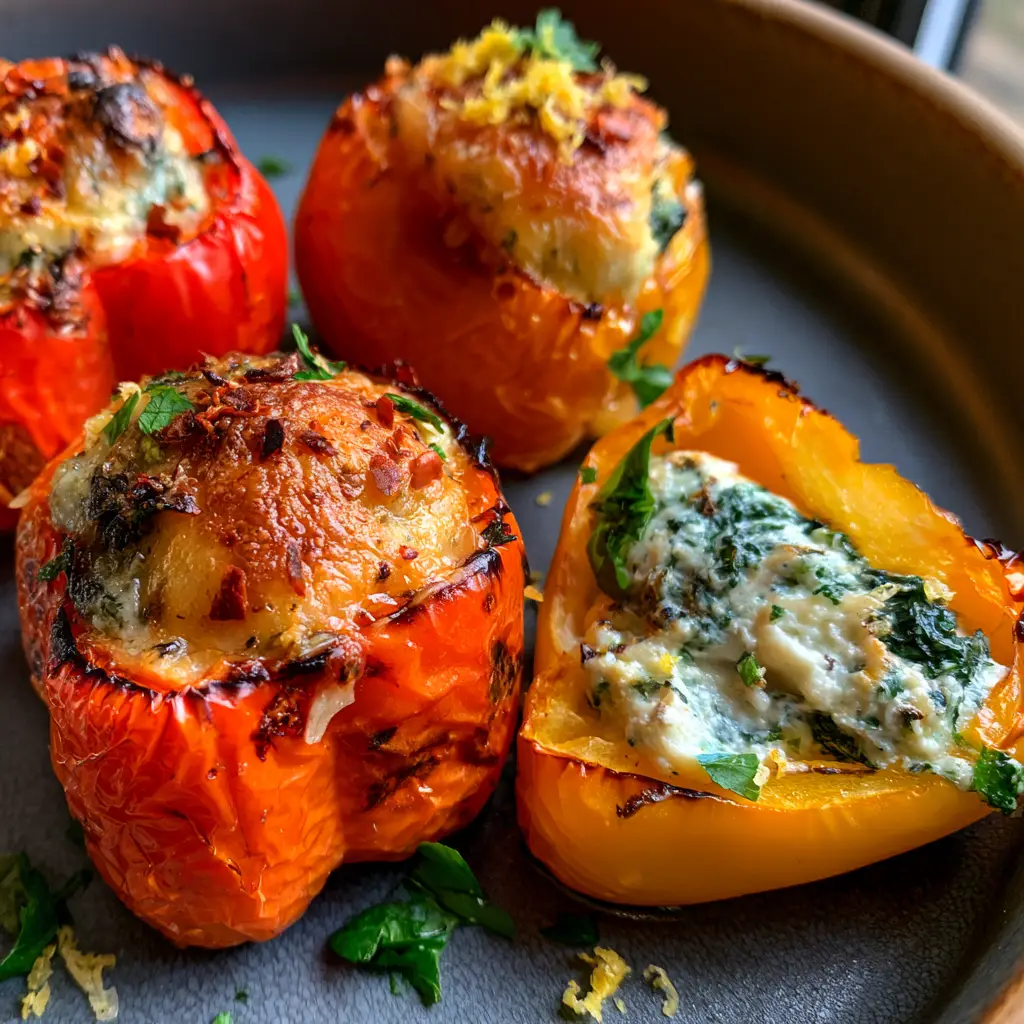
Ricotta stuffed peppers are the vibrant, creamy, and visually stunning appetizer your next gathering needs. Imagine bite-sized mini bell peppers, roasted until their skins are perfectly blistered and charred, yet firm enough to hold a decadent, aerated cheese filling. This recipe balances the sweetness of sun-ripened peppers with the savory depth of toasted parmesan and the bright citrus notes of micro-planed lemon zest.
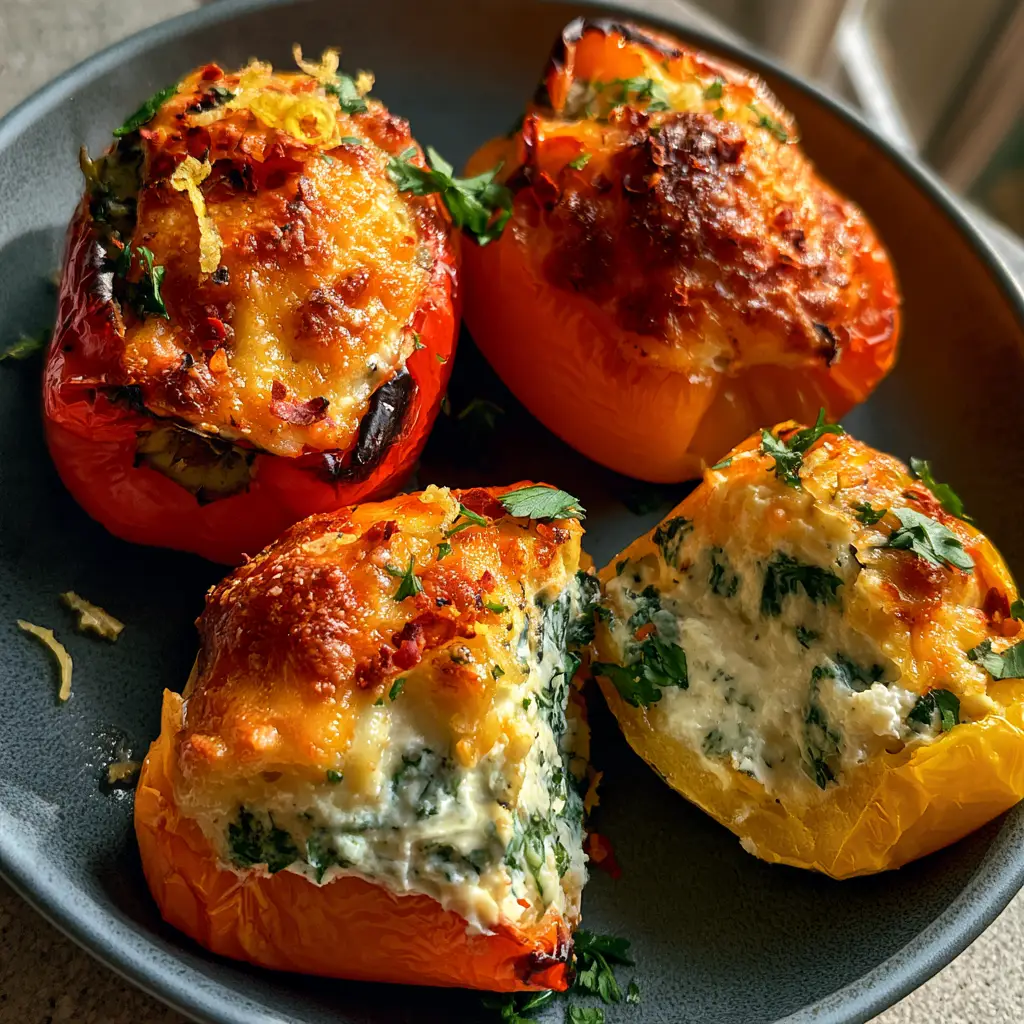
Whether you are looking for a sophisticated starter or a low-carb snack that doesn’t compromise on flavor, these ricotta stuffed peppers deliver on every front. The contrast between the matte charcoal serving dish and the bright reds, oranges, and yellows of the peppers makes this a true showstopper. You will love how the herb-flecked interior peeks through every bite.
Why You Will Crave These Roasted Ricotta Stuffed Peppers
- Textural Perfection: The peppers maintain a thick, firm wall that provides a satisfying snap against the velvety, cloud-like ricotta filling.
- Visually Arresting: The vibrant colors of the roasted mini bell peppers are enhanced by a golden-brown parmesan crust and fresh green parsley.
- Flavor Harmony: Creamy cheese, wilted spinach, and a hint of red pepper flakes create a balanced heat that lingers just long enough.
- Make-Ahead Friendly: You can prep the filling and stuff the peppers hours before your guests arrive, making hosting a breeze.
If you enjoy these stuffed bites, you should also try our creamy mushroom stuffed shells for a heartier pasta version of this flavor profile. Much like our side of creamy garlic mushrooms, this dish relies on high-quality dairy and fresh herbs to elevate simple ingredients into something extraordinary.
Essential Ingredients for Gourmet Ricotta Stuffed Peppers
To achieve that culinary-magazine quality, every ingredient must serve a specific purpose. Here is what you will need for the perfect batch:
Mini Bell Peppers: Choose a mix of red, orange, and yellow. Look for peppers with smooth, tight skin to ensure they can withstand the high-heat blistering process without collapsing.
Whole Milk Ricotta Cheese: 15 oz (425g). For the best results, use a high-quality ricotta. We will aerate the cheese to ensure it feels light and whipped rather than heavy.
Baby Spinach: 2 cups (60g). Finely chopped and wilted, this adds an earthy contrast to the richness of the cheese.
Parmesan Cheese: 1/2 cup (50g), finely grated. This creates that essential toasted parmesan crust on top of each pepper.
Lemon Zest: The oils from one large lemon provide a necessary brightness that cuts through the fat of the ricotta.
Extra Virgin Olive Oil: Used for both the roasting process to achieve that blistered skin and as a final drizzle for a luxurious mouthfeel.
Seasonings: Sea salt, freshly cracked black pepper, and red pepper flakes for a subtle, warming kick.
Fresh Italian Parsley: Finely chopped, this adds the final touch of color and a fresh, peppery finish.
Mastering the Blister: Step-by-Step Instructions
Step 1: Preparing the Peppers for Roasting
Preheat your oven to 400°F (200°C). Carefully slice the mini peppers in half lengthwise, keeping the green stem intact for a professional, rustic look. Remove the seeds and white ribs. Toss the peppers in a bowl with 1 tablespoon (15ml) of extra virgin olive oil and a generous pinch of sea salt. Ensure every inch of the skin is coated; this is the secret to achieving that perfectly charred, blistered exterior.
Step 2: Crafting the Aerated Ricotta Filling
In a medium mixing bowl, combine the ricotta, wilted baby spinach, and half of the parmesan cheese. Use a whisk or a fork to vigorously beat the mixture for 60 seconds. This incorporates air, creating the thick, aerated texture seen in professional food photography. Fold in the lemon zest and red pepper flakes. For more adventurous eaters, you could even pair this with our fun sushi cups for a fusion-style appetizer spread.
Step 3: The Stuffing Technique
Using a small spoon or a piping bag, fill each pepper cavity generously. Do not be afraid to mound the filling slightly higher than the pepper walls; as it roasts, it will settle into a beautiful, firm shape. Sprinkle the remaining parmesan cheese over the top of the filling. This will eventually become the golden-brown toasted crust that Pinterest users love to save.
Step 4: Roasting to Perfection
Place the peppers on a parchment-lined baking sheet. Roast for 12-15 minutes. You are looking for the pepper skin to show vibrant, slightly charred spots while the filling remains creamy and the top turns golden. The walls of the pepper should remain firm and thick, never collapsing or becoming mushy.
Step 5: The Finishing Flourish
Remove from the oven and transfer to a matte charcoal ceramic dish. Drizzle with a final touch of olive oil. Garnish with the remaining lemon zest, a sprinkle of sea salt, and a handful of finely chopped parsley. The tiny red chili flakes should be visible against the white cheese, signaling the flavor profile to your guests.
Expert Tips for Success
- Drain Your Ricotta: If your ricotta is particularly watery, let it sit in a fine-mesh strainer for 15 minutes before mixing. This prevents the peppers from becoming soggy.
- High Heat is Key: To get the blistered skin without overcooking the vegetable wall, the oven must be hot. Don’t be tempted to lower the temperature.
- Keep the Stems: Leaving the stems on not only looks beautiful but acts as a natural “handle” for guests to pick them up at a party.
- Color Variety: Using a mix of red, orange, and yellow peppers isn’t just for looks; each color has a slightly different sugar content, offering a complex flavor profile.
If you are looking for more vegetable-forward inspiration, check out our vegan casserole recipes or pair these peppers with a tangy Greek yogurt macaroni salad for a complete summer lunch.
Storage, Reheating & Freezing
Storage: These ricotta stuffed peppers are best served fresh, but leftovers can be stored in an airtight container in the refrigerator for up to 3 days.
Reheating: To maintain the firm wall of the pepper, reheat them in the oven at 350°F (175°C) for 5-7 minutes. Avoid the microwave, as it will make the peppers limp and the cheese rubbery.
Freezing: We do not recommend freezing this dish, as the ricotta texture will change significantly upon thawing, and the peppers will lose their iconic snap.
What to Serve With Ricotta Stuffed Peppers
These peppers are incredibly versatile. Serve them as an appetizer alongside a crisp glass of Sauvignon Blanc, or make them the star of a light lunch by pairing them with a fresh arugula salad. They also work beautifully as a side dish for grilled chicken or steak. If you are hosting a large barbecue, they provide a sophisticated contrast to classic sides like a creamy dill macaroni salad.
Frequently Asked Questions
Absolutely. Air fry at 375°F (190°C) for 8-10 minutes. The air fryer is excellent for achieving that charred skin while keeping the pepper wall firm.
Yes, but you will need to adjust the cook time to 25-30 minutes. Large peppers have more water content, so they may soften more than mini peppers.
No! The blistered, charred skin is a key component of the flavor and texture of these ricotta stuffed peppers. It adds a smoky sweetness that complements the cheese.
You can use a firm almond-based ricotta substitute. Ensure it is well-seasoned with nutritional yeast and lemon to mimic the savory profile of parmesan.
Sogginess usually comes from watery ricotta or overcrowding the pan. Make sure to drain your ricotta cheese and roast the peppers at a high temperature (400°F) to evaporate excess moisture quickly.
The Best Ricotta Stuffed Peppers Recipe
Ricotta Stuffed Peppers: The Ultimate Blistered Mini Pepper Appetizer
Ingredients
Equipment
Method
- Preheat oven to 400°F (200°C). Slice peppers in half lengthwise, remove seeds, and toss with olive oil and sea salt until skins are coated.
- Whisk ricotta, spinach, and half the parmesan until aerated and light. Fold in lemon zest and red pepper flakes.
- Stuff peppers with the ricotta mixture, top with remaining parmesan, and bake for 12-15 minutes until blistered and golden.
Notes
Leave the stems on the mini peppers for a beautiful visual presentation and easy handling.
Share Your Culinary Masterpiece!
Did you make these ricotta stuffed peppers? We want to see your results! Save this recipe to your favorite Pinterest board by clicking the “Pin” button below. Follow cathy_kitchen_official for more daily recipe inspiration. If you tried this recipe, please leave a 5-star rating and upload a photo in the comments below—we love seeing your blistered peppers in action!