There is nothing quite like the first crunch of perfectly prepared Zucchini balls. Imagine a rugged, golden-brown panko crust that shatters upon impact, giving way to a steaming-hot, savory center. These aren’t your typical mushy vegetable fritters; we are crafting a firm, emerald-flecked masterpiece that balances the sharpness of melted parmesan with the aromatic punch of fresh minced garlic and chopped parsley. Whether you are looking for a show-stopping appetizer or a kid-friendly way to use up garden produce, this recipe delivers a macro-perspective level of detail in every bite.
Achieving that specific “rugose” texture described in professional food photography requires more than just mixing ingredients. It demands a culinary forensic approach to moisture management. By following this guide, you will learn how to transform humble squash into a high-protein, cheesy delight that stands up to a dip in creamy white sauce without losing its structural integrity. Let’s dive into the science of the perfect vegetable ball.
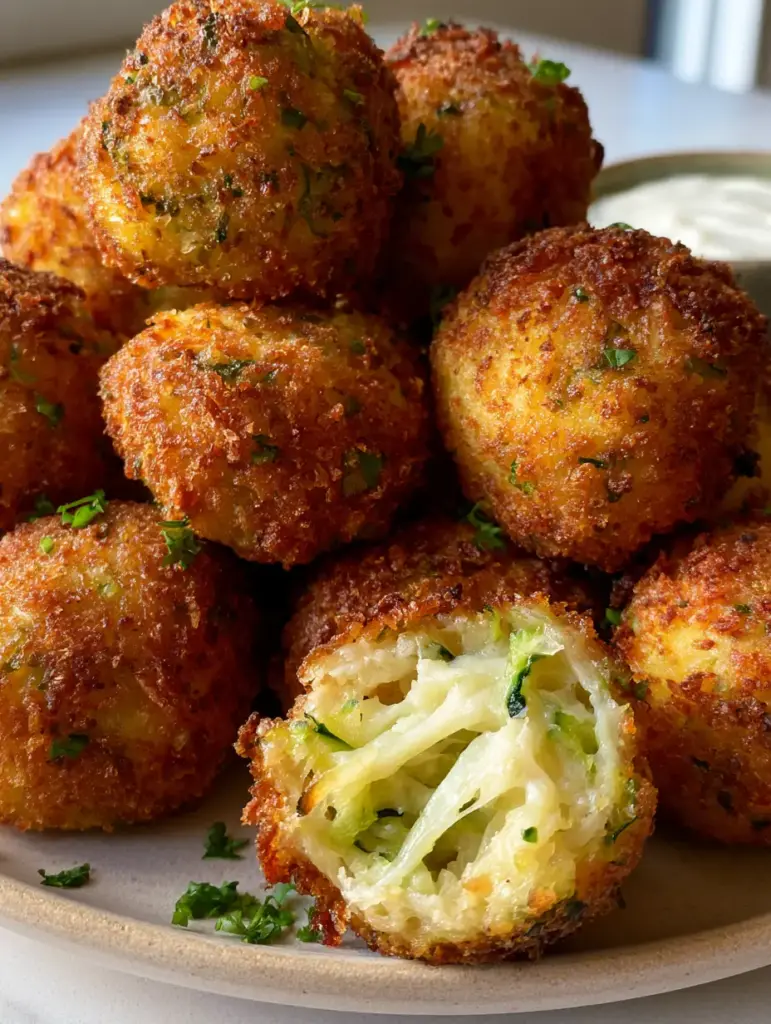
Why These Golden-Brown Crispy Zucchini Bites Reign Supreme
- Structural Integrity: Unlike soggy alternatives, these remain firm and upright on the plate thanks to a specialized moisture-wicking technique.
- The Panko Factor: We utilize a specific dredging method to ensure a rugged, ultra-detailed crust that stays crunchy for hours.
- Flavor Density: With a high ratio of aged parmesan to zucchini, every mouthful is an umami bomb balanced by fresh herbs.
- Versatile Cooking: While we focus on a classic finish, these techniques work perfectly for oven-baked zucchini balls or air-fried versions.
Essential Components for the Perfect Zucchini Balls
Fresh Zucchini (Courgette): The star of the show. You will need roughly 2 medium zucchinis to yield the 2 cups (approx. 300g) of shredded vegetable required after the water has been extracted.
Grated Parmesan Cheese: Avoid the canned stuff. Freshly grated parmesan provides the “visible threads” of melted cheese and acts as a structural binder as it cools. You will need 1/2 cup (50g).
Panko Breadcrumbs: These Japanese-style crumbs are larger and airier than traditional breadcrumbs, creating that signature rugged exterior. We use 1 cup (60g) for the mixture and coating.
Minced Garlic: Three cloves (approx. 15g) provide the aromatic backbone. Using fresh garlic rather than powder ensures those savory bits caramelize slightly during the cooking process.
Fresh Parsley: Half a bunch of Italian flat-leaf parsley (approx. 1/4 cup/15g chopped) adds the “bright green bits” that make the dish visually pop against the golden crust.
Large Eggs: Two eggs (approx. 100ml) serve as the protein bridge, holding the zucchini and cheese together so the balls don’t fall apart in the pan.
Flaky Sea Salt and Black Pepper: Critical for both seasoning and the initial “sweating” of the zucchini to remove excess hydration.
Neutral Searing Oil: You will need about 3 tbsp (45ml) of avocado or grapeseed oil to achieve that deep golden-brown sear without smoking.
Professional Tools for Culinary Success
To achieve the macro-perspective quality seen in elite food photography, you need the right gear. A box grater with large holes is essential for creating those thick “emerald zucchini shreds.” A clean muslin cloth or a high-quality kitchen towel is non-negotiable for squeezing out the liquid. For the cooking phase, a heavy-bottomed cast iron skillet or a non-stick frying pan will ensure even heat distribution for that uniform crispy crust.
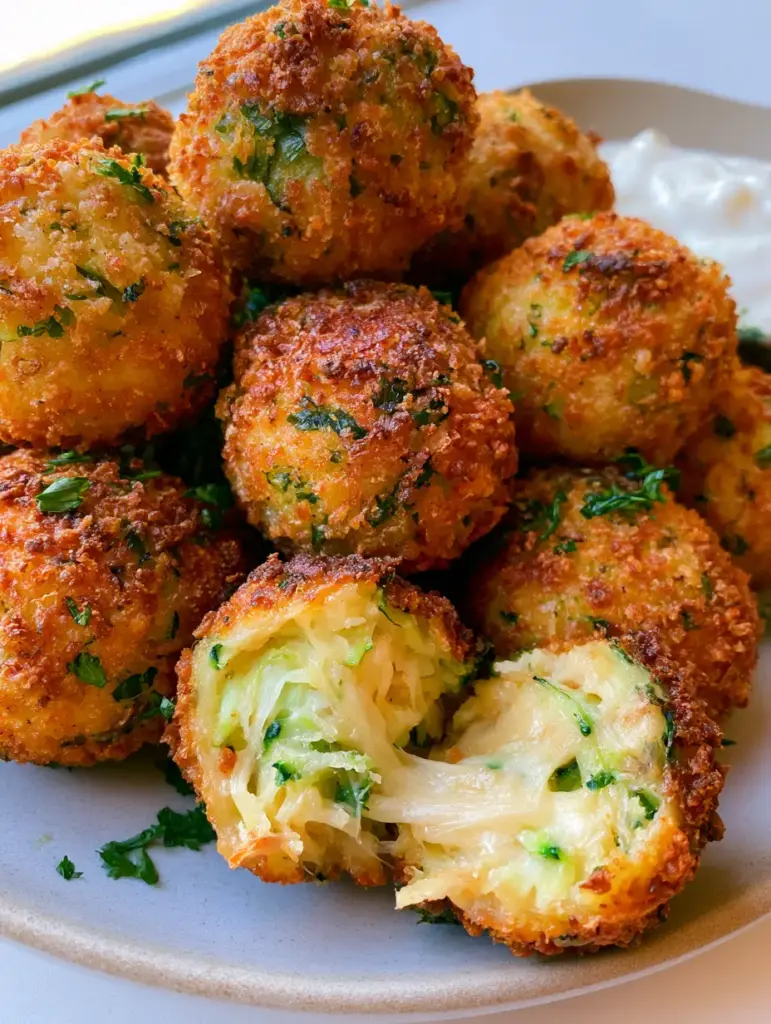
The Forensic Guide to Preparation: Step-by-Step
Step 1: The Extraction Process (Moisture Management)
Zucchini is roughly 95% water. To avoid a soggy interior, you must grate the zucchini and toss it with 1 tsp (5g) of salt. Let it sit in a colander for 10 minutes. This draws the moisture out through osmosis. After 10 minutes, wrap the shreds in your kitchen towel and squeeze with all your might. You should be left with a dry, compact ball of zucchini shreds that look like bright green confetti.
Step 2: Building the Aromatic Base
In a large mixing bowl, combine the “bone-dry” zucchini with the minced garlic, chopped parsley, and 1/2 cup (50g) of the parmesan. The smell at this stage should be intensely herbaceous and sharp. If you enjoy this flavor profile, you might also love our zucchini breadsticks for a different textural experience.
Step 3: Binding and Shaping
Beat the eggs lightly and fold them into the mixture along with 1/2 cup (30g) of the panko. The mixture should be tacky but hold its shape when rolled. Scoop about 2 tbsp (30ml) of the mixture and roll it into a firm ball, roughly the size of a golf ball. Ensure there are no large gaps, as these will trap steam and cause sogginess.
Step 4: The Final Panko Dredge
Roll each ball in the remaining panko breadcrumbs. Press the crumbs in firmly to create that “rugged texture.” This layer acts as an insulator, protecting the delicate interior while the outside fries to a crisp.
Step 5: Achieving the Golden-Brown Sear
Heat your oil over medium-high heat. Place the Zucchini balls into the pan, leaving space between each. Listen for a gentle sizzle—this is the sound of the crust dehydrating and crisping. Cook for 3-4 minutes per side, rotating carefully, until they are deep golden-brown all over. You are looking for a “steaming-hot center” and a crust that sounds hollow when tapped with a fork.
Expert Tips for High-RPM Kitchen Performance
- The Double Squeeze: If you think you’ve squeezed enough water out, squeeze once more. The drier the zucchini, the crispier the result.
- Chill Before Frying: If you have time, let the shaped balls rest in the fridge for 20 minutes. This helps the starch in the panko set, leading to a firmer ball.
- Don’t Overcrowd: Frying too many at once drops the oil temperature, leading to oil absorption and—you guessed it—sogginess.
- Salt Immediately: Hit the balls with a final pinch of flaky sea salt the second they come out of the pan so it sticks to the residual oil.
Storage and Reheating for Longevity
These are best served fresh, but if you have leftovers, store them in an airtight container lined with a paper towel for up to 3 days. To reheat and maintain that crispy crust, avoid the microwave at all costs. Instead, pop them into a 375°F (190°C) oven or an air fryer for 5 minutes. This will revive the crunch and ensure the parmesan center becomes gooey again, much like our air fryer zucchini crisps.
What to Serve With Your Crispy Zucchini Bites
For the ultimate Mediterranean-inspired spread, pair these balls with a refreshing Greek salad or a traditional horiatiki. The acidity of the tomatoes and feta cuts through the richness of the fried parmesan beautifully. If you’re looking for something heartier, serve them alongside a bowl of chicken orzo pasta. A creamy white dipping sauce, such as a lemon-garlic aioli or a tzatziki, is the perfect cool accompaniment to the hot, spicy garlic notes in the balls.
Frequently Asked Questions
Yes! Place them on a parchment-lined tray and bake at 400°F (200°C) for 20-25 minutes, flipping halfway through, until they reach a golden-brown crispy exterior.
Absolutely. Simply swap the panko breadcrumbs for a gluten-free panko alternative or almond flour, though panko provides the best rugged texture.
The key is moisture removal. You must salt the shredded zucchini, let it sit, and then use a kitchen towel to squeeze out every drop of liquid until the shreds are bone-dry.
They are best served immediately. However, if they lose their crunch, you can revive them perfectly in an air fryer or hot oven for 5 minutes.
A creamy white sauce like lemon-garlic aioli, tzatziki, or even a simple herb-infused Greek yogurt works best to balance the savory parmesan notes.
The Ultimate Zucchini Balls Recipe Card

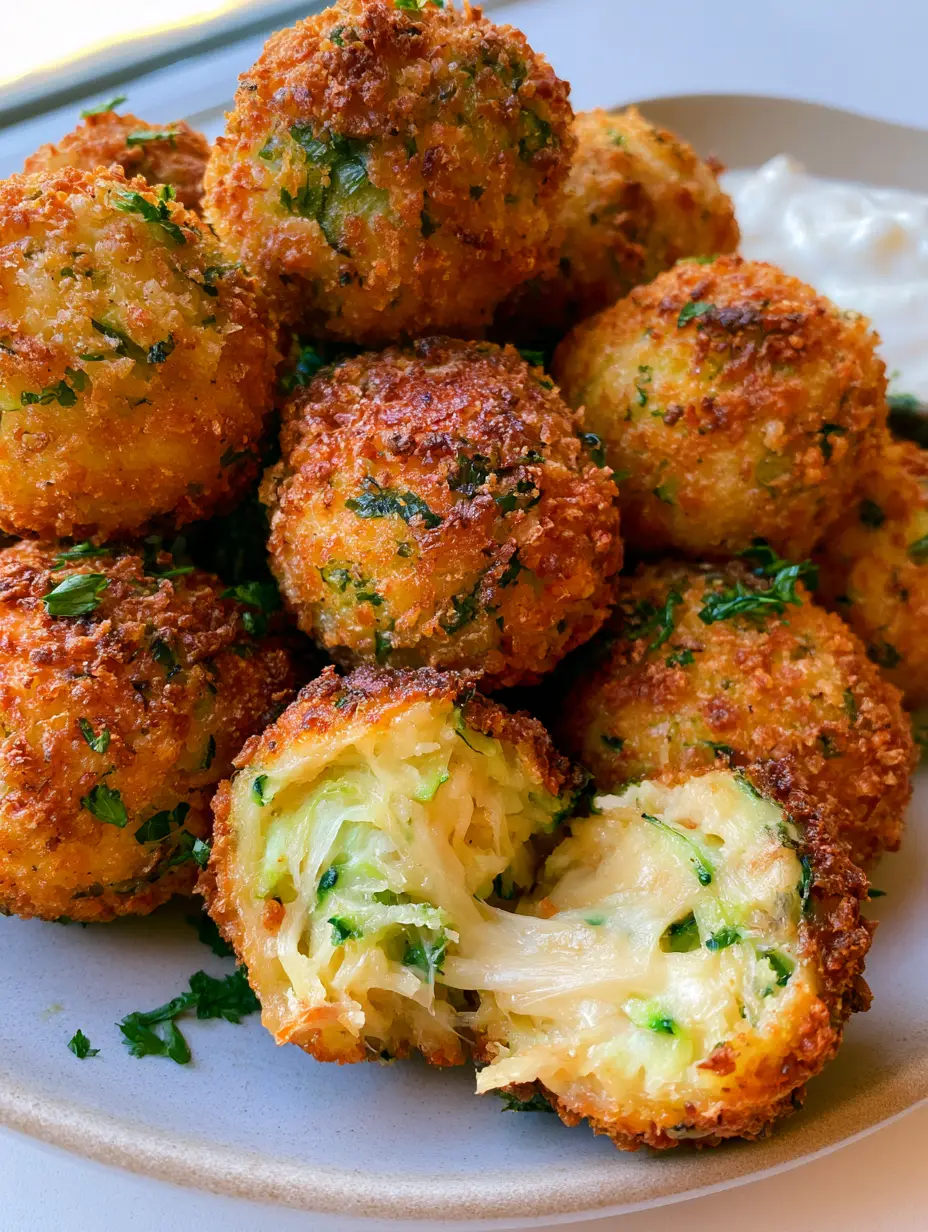
Zucchini Balls with Garlic and Parmesan: The Ultimate Crispy Recipe
Ingredients
Equipment
Method
- Grate the zucchini using a box grater. Toss with 1 tsp salt and let sit in a colander for 10 minutes.
- Transfer zucchini to a clean towel and squeeze out all liquid until the shreds are dry and firm.
- In a bowl, mix dried zucchini, garlic, parsley, parmesan, 1/2 cup panko, and eggs until a tacky dough forms.
- Roll into 1.5-inch balls and dredge in the remaining panko crumbs, pressing to adhere for a rugged crust.
- Heat oil in a skillet over medium heat. Fry balls for 3-4 minutes per side until golden-brown and crispy.
- Drain on a wire rack and sprinkle with flaky sea salt while hot. Serve with creamy dipping sauce.
Notes
Use Panko instead of regular breadcrumbs for the ultimate rugged, crunchy texture.
Conclusion and Culinary Call to Action
Mastering Zucchini balls is a rite of passage for any home cook looking to elevate simple vegetables into a gourmet experience. The contrast between the rugged panko exterior and the tender, cheesy interior is a sensory delight that never fails to impress. We hope this forensic look at zucchini science helps you achieve the perfect golden-brown result every time.
Did you try this recipe? We would love to hear how your crust turned out! Leave a comment below, and don’t forget to share your photos and tag us. For more daily inspiration, follow us on Pinterest and save this recipe to your “Healthy Appetizers” board!